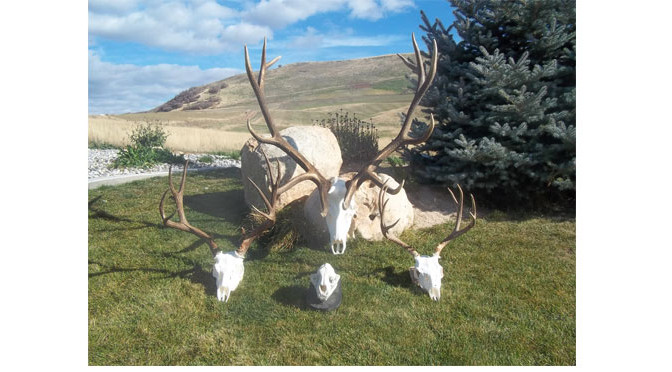
Taxidermy is a great way of displaying your trophies once you have been lucky enough to harvest an animal. There are several ways that you can mount your trophy that all have different appeals. One way that I have started mounting my trophies is to do a European mount. A European mount is a classy way to mount your trophy that is an alternative to the classic shoulder mount.
Today taxidermy prices can become very expensive. You could easily spend upwards of 700 dollars for a quality shoulder mount. I am on a strict budget and I can’t justify spending that kind of money for a mount. Besides I would rather save that money and spend it on new gear and hunting adventures.
I have been fortunate to harvest a few trophies the past few years. I wanted a way to display these animals in my home that wouldn’t break the bank. I started researching different methods of doing a European mount for myself. Through trial and error I have come up with a method that has worked well for me the past few years. I have used this method to do deer, elk, bears and mountain lions. I would like to walk you through the process and methods that I use.
The first thing I do is remove the head from the animal. I do this at the base of the skull and the last vertebra of the neck. I then remove the remaining hide that is attached to the skull. On deer and elk I will then remove the bottom jaw and the tongue. I then try and remove as much meat and fat that is attached to the skull as I can. Be careful at this point as you don’t want to leave knife marks on the skull. Take your time and don’t get in hurry. At this point you are ready to start boiling the skull.
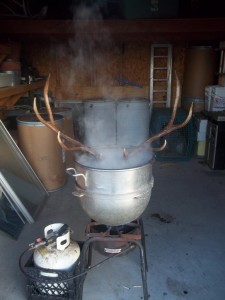 You will need a pot that is big enough to cover the entire skull of the animal under water. I place skull in an empty pot and fill the pot up until the water just covers the skull. You don’t want the horns in the water during the boiling process. If you do it will cause the horns themselves to loose color and you will have to stain the horns in order for them to look good again.
I then remove the skull and horns from the water and turn on the burner to get the water boiling. At this point I will add about a ¼ cup of Dawn dishwashing soap. The Dawn soap has a degreasing agent in it that will help pull a lot of the fat out of the skull. This will help prevent the skull turning yellow later on.
Once the water starts to boil I turn the burner down to the point the water is at a nice gentle boil. If you get the water boiling to hard you will have water splashing up on the horns themselves causing them to loose color. I then place the skull into the water. I will let the skull boil for about 20 minutes then I will pull it out and hit it with a power washer. You don’t want to boil the skull for too long or it will make the bone brittle.
 The power washer will knock the majority of the remaining fat and meat off of the skull. This is the part of the process that you want to be wearing some of your old clothes and safety glasses. When you hit the skull with the high pressure, let’s just say there is a lot of debris flying around. This is the point my wife and kids watch from a distance. I power wash the skull until the majority of the remaining meat has come off. I will then place the skull back into the boiling pot for another 20 minutes. I will then pull it back out and hit it with the power washer one more time. This will get all but a small amount of meat and fat off of the skull. Whatever fat and meat is remaining I will remove with a pair of needle nose pliers.
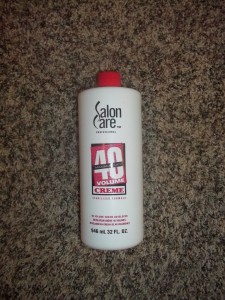 At this point I place the skull out in the sun to allow it to dry. Once it has completely I then start the bleaching process. To bleach the skull I use hydrogen peroxide. I go to the local beauty supply company and buy the 40% peroxide that they use in beauty solons to bleach hair. You have to be careful with this stuff because it is pretty powerful stuff. Be sure to wear rubber gloves when applying this stuff. If you do happen to get it on you was it off as quick as you can because it will burn your skin if left on for too long.
I use a small paint brush and apply the peroxide to the whole skull. Be careful not to let any drip onto the horns as it will bleach the horns as well. I let this sit for 24 hours and then was it off. I will then apply a second coat of the peroxide and then let it sit for another 24 hours. This second coat will whiten the skull a lot more than the first coat. If you are able to, the peroxide whitens a lot better if you can leave the skull in a place that it can get a lot of sunlight. I then wash the second coat off and allow the skull to air dry. Once the skull is completely dry you are ready to mount the skull onto your wall.
Photo 4
There are several ways that you can mount the finished skull in your house. I personally like to mount my critters with a product called the Skull Hooker. This products just adds a little more decoration to the mount giving it a classy look. They build a couple of different sizes to cover all the animals that you would want to hang on your wall. Check them out.
Doing your own European mount is an easy process that can be done with very little equipment. It is a great way to display your success in the field without breaking the bank. Give it try after your next successful hunt. You will be able to display your critters in your house and have the satisfaction of knowing you did it yourself.
Discover more from The HuntFishTravel Show
Subscribe to get the latest posts sent to your email.
I currently have 3 being done the old fashioned way. They are sitting in my back yard letting the bugs do the work. Going to read this one later
Euro mounts look good and easy on the pockets for average hunters, I have been doing them for a few years now I hand cut my wood from mesquite.